Resolve QuickBooks Error C=224: A Complete Troubleshooting Guide
QuickBooks is a popular and useful accounting
solution. It comes with several features but there are certain errors involved
as well. One such very common issue is QuickBooks error message C=224. Whenever
saving a report to an excel file, this error might just pop up.
The file can be huge or it might be corrupted.
This can eventually lead to this error. In this article you will get all the
technical help to fix QuickBooks
error c=224. Thus, keep reading this article till the end.
What Causes QuickBooks Error
C=224?
The major causes of QuickBooks Error C = 224
are:
●
A damaged company file or windows registry
files.
●
Problem with log file (.tlg file)
●
programming bug in older version of QuickBooks
● Problems with computer settings
Ways to Fix the QuickBooks Error
C=224
Following are the DIY methods in order to rectify the error
code C=224 in QuickBooks desktop:
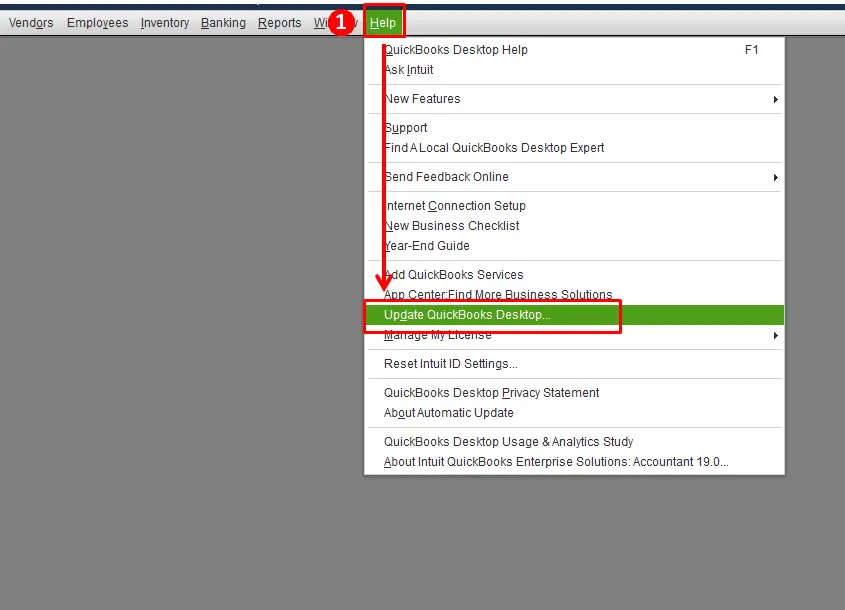
Solution 1: Update QuickBooks
- Firstly, open QuickBooks.
- Open “Help” menu and then select “Update
QuickBooks Desktop” and then select “update now”.
- Verify tick mark in maintenance released and feature boxes.
- Select “reset update” to remove old updates.
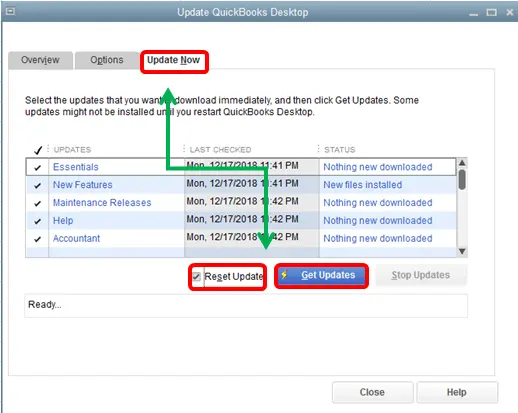
- Got to “get updates” and then click “download new update”.
- Next, install new update.
- Reboot the system and refresh and restart QuickBooks.
Solution 2: Remove ECML
files
- Click “Windows + R”
- Open “New Window”
- Next type
the following - "C:\Program Data\Intuit|Entitlement Client\v8"
- Delete the "EntitlementDataStore.ecml."
file.

- Finally, close
the window
- Then close
QuickBooks
- Relaunch QuickBooks
again and the register the product again.
Solution 3: Run QuickBooks Verify
and Rebuild Data Utility
- Go to “File”
menu -> Select “Utilities” -> Choose “Verify Data”.
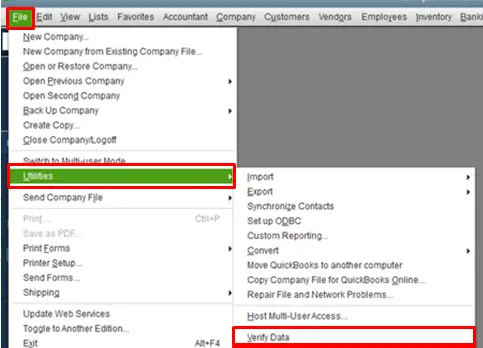
- Click OK. Verification process begins and then ends. Click OK.
- Open QuickBooks.
- Go to
the “File” menu -> Select “Utilities” -> Choose “Rebuild
Data”.
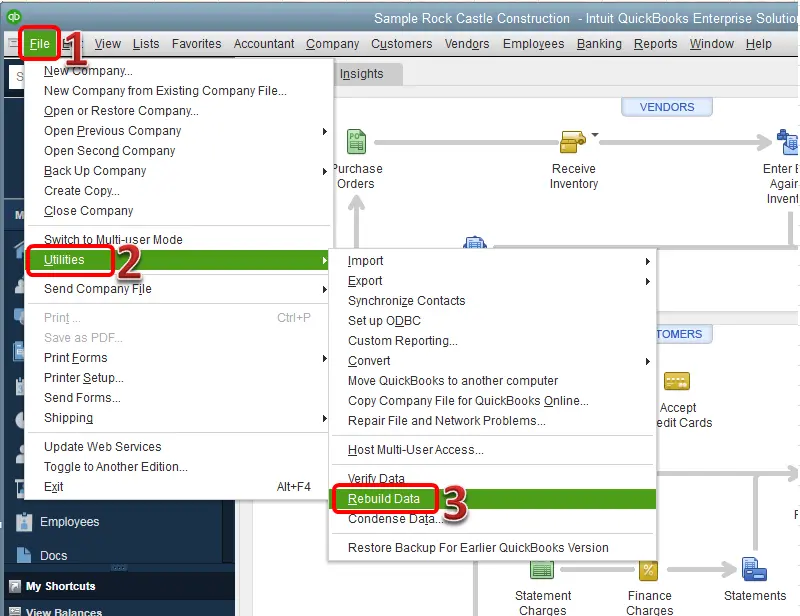
- Click OK to
create backup.
- Save a backup
file in your system.
- Left-click on the “Next” tab ->
choose “Browse” -> select the destination
in your system
- Click OK and then save the file.
Solution 4: Repair .TLG
Damages QuickBooks File
- Open “Windows File
Manager” -> Go to “QuickBooks Installation Folder”
- Locate the .tlg file with the same name as your company file
- Right-click on the .tlg file -> Go to “Options”
-> Choose “Rename” -> Enter the rename.
- Add the old at the end of the file name
- Save the file
- Open QuickBooks Desktop software
- Check for the issue.


Comments
Post a Comment